
There are many wireframe applications that I have tried which are available to designers including Balsamiq, Sketch, and Macaw but I always find myself preferring to use Adobe Illustrator. At the time of writing this article, Illustrator is on version CC 2014.1.1 (v18.1.1). Here are some tips and tricks that I use to create Adobe Illustrator wireframes.
New Document Presets
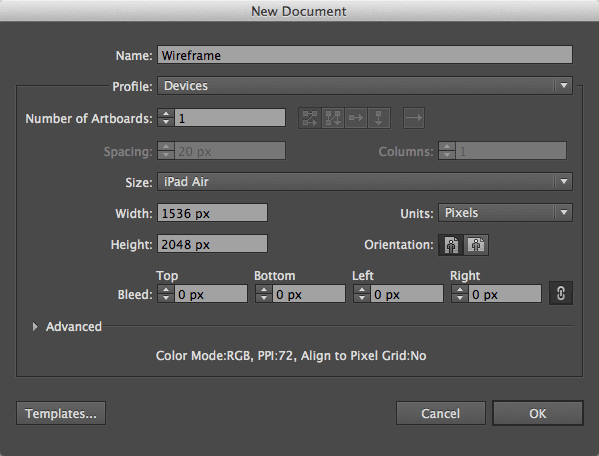
Illustrator gives you a plethora of options when creating a new document, one of those is canvas size. The “New Document” dialog box, gives Profile options including Web and Devices. There are several predefined selections within each option for smartphone, tablet, or desktop browser size. These default settings are preconfigured with the appropriate Units (pixel) and Screen DPI (72 dpi).
Multiple Artboards

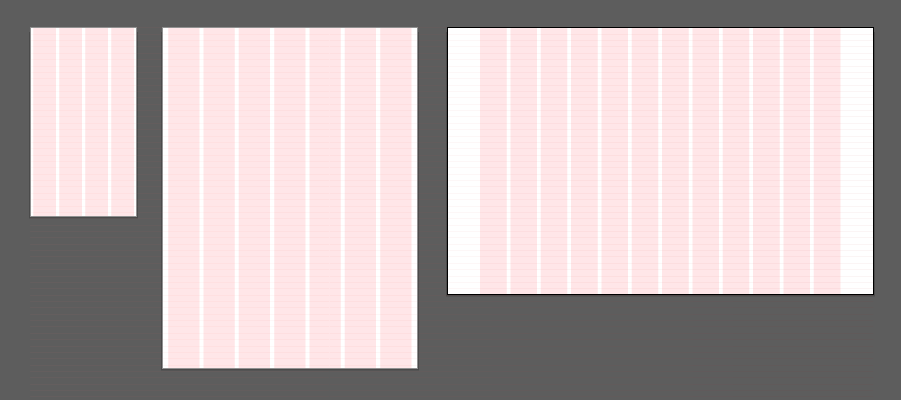
Each document can have multiple Artboards. Personally, I like to create three Artboards in my wireframe document that represent the different devices common to responsive web design (smartphone, tablet, and desktop). This gives me the ability to duplicate content across Artboards and envision how the content will reflow from mobile to desktop.
Bonus tip
Once the Illustrator document is configured to your liking, you can save the document as an Illustrator Template file to use across multiple projects.
Create a Grid (columns & baseline)

Before creating the wireframe’s grid, I like to have the document grid set to 10px with “Snap to Grid” turned on. You can adjust the document’s grid spacing in the application menu under Illustrator (Mac)/File (PC) > Preferences > Guides & Grids and “Snap to Grid” can be found under View > Snap to Grid. The later feature will snap each node of the vector art to a point on the grid. This ensures the graphics stay sharp if they are exported out as a raster graphic (pixel based graphic). To view the document’s grid on the Artboards, go to View > Show Grid.
To quickly make evenly spaced vertical columns for the wireframe, select the rectangular shape tool and draw a rectangle on the canvas that is the size of the desired active area of the web page. Then choose Object > Path > Split into Grid from the application menu. Inside the “Split Into Grid” dialog box you can specify the number of columns and the gutter width between columns that the rectangular shape will be subdivided into. Thus, creating a multi-column grid.
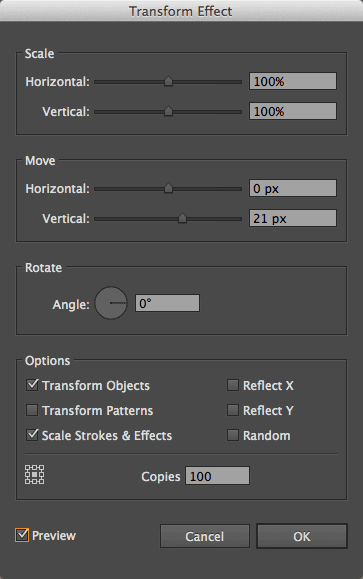
In addition to columns, I like to have a baseline grid to help establish a vertical rhythm. With the line tool selected, draw a line across the top of the Artboard. Select the line and from the application menu choose Effects > Distort & Transform > Transform. In the “Transform Effect” dialog box, set the number of copies to 100 or more depending upon the height of the wireframe. Then in the “Move” section, set the desired Vertical pixel amount of the baseline grid.
Bonus tip
Once my column and baseline grid has been established, I like to fill them with red and change the opacity to 10%. This makes the grid stand out against the other elements in the wireframe document.
Swatches
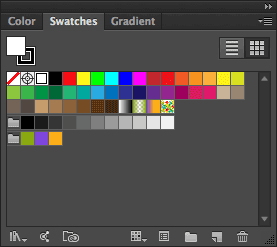
The Swatches panel allows you to create, group, and control all named colors and gradients in a document. These colors can then be applied to objects and typography or saved as a Swatch Library for use in other documents and Adobe applications.
Paragraph and Character Styles
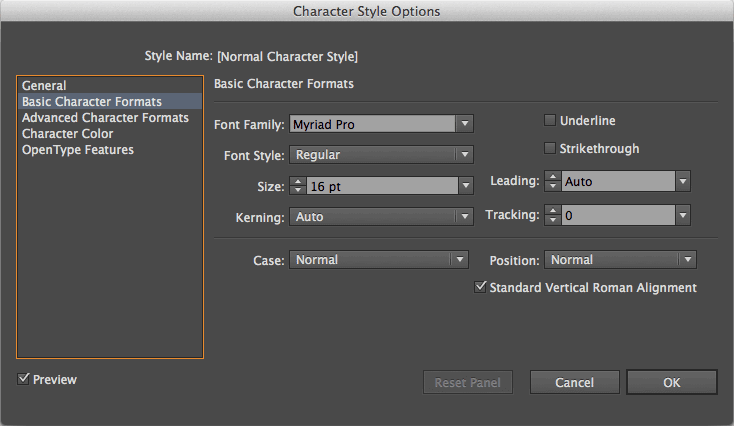
Similar to swatches, paragraph and characters styles allow the creation and definition of the document’s typography. The advantage to using paragraph and character styles becomes apparent when a style is adjusted, that change becomes instantly reflected across all the text that has that style applied to it in the document.
Symbols
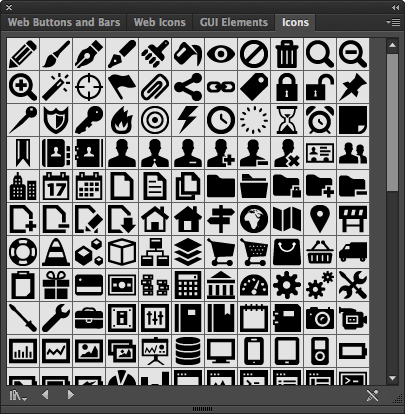
A symbol is an art object that can be reused in a document. Illustrator comes preloaded with over a dozen Symbol Libraries. To load a Symbol Library, click on the Symbols panel fly-out menu > Open Symbol Library. Web Buttons and Bars, Web Icons, GUI Elements, and Icons are some great starter symbol libraries for a project. To use a symbol, drag and drop it onto the Artboard.
To create a custom symbol, draw the desired element on the Artboard. Once complete, select the element and drag it into the Symbols panel to turn it into a new symbol. Once all the desired symbols have been created, click on the Symbols panel fly-out menu > Save Symbol Library to save the custom symbols for future projects.
Symbols can also be individually modified once they are on an Artboard. This breaks the relationship with the original symbol which can not be undone. This means that if a symbol is updated the change will not be reflected in these objects. To break a symbols relationship, right-click on the symbol and from the drop-down menu choose “Break Link to Symbol”.
Layers
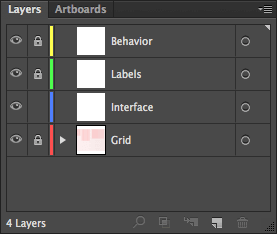
Besides organizing the content in a document, layers can have their visibility toggled on or off. This is beneficial when exporting the artwork for documentation as I prefer to have four layers in my wireframe document for this exact purpose. The bottom layer is for the grid, then the wireframe interface, followed by element labels, and finally a description of each element’s behavior. Each layer is appropriately named Grid, Interface, Labels, and Behavior.
Illustrator is a powerful tool that can be customized to improve your productivity. These features along with many others which were not covered, including the ability to export elements into production ready code such as Cascading Style Sheets (CSS) and Scalable Vector Graphics (SVG), give Adobe Illustrator many distinct advantages for UI Designers. Hope you are to apply some of these time-saving techniques into your workflow.
Download the Adobe Illustrator CC template file created in this post to use in your projects.
Download Source File